Thursday, February 26, 2015

Momofuku Milk Bar Mint Chocolate Chip Layer Cake

Momofuku Milk Bar Mint Chocolate Chip Layer Cake


You can find the original recipe here: http://milkbarstore.com/main/press/recipes-and-how-tos/#mint%20chocolate

My Love of Momofuku Milk Bar

Those who have been unlucky enough to get in a conversation with me about baking (I can go on and on and on) know how much I love and admire Christina Tosi and her Momofuku Milk Bar empire. When you hear Christina speak about baking and her eating habits, you hear someone who is truly passionate about the craft. Her baking style is so unique. It combines a high quality and elegant approach with a no fuss gauche attitude. She specifies Valrhona brand cocoa powder and grapeseed oil at the same time as instructing us not to sift flour and to put in potato chips into cookie batter. Go ahead and check out her website (http://milkbarstore.com/main/) to see what I am talking about.

The last time I visited New York, I suggested (well... forced) my friend to go with me to check out Momofuku Milk Bar. When we got close by, I darted towards the doors. We had to wait a while because the service was slow, but it was totally worth it. I ordered crack pie, a thanksgiving croissant, and pumpkin cake truffles. Though the crack pie was a tad salty for my taste, I was overjoyed to finally try Momofuku Milk Bar. If only Christina was there in person. Christina Tosi, if you are reading this, I am your #1 fan.

The Recipe

Okay, enough flattering. Now for the actual recipe. Momofuku Milk Bar style cakes may seem overwhelming because of the multiple components and the assembling, but it is totally doable, especially if you break up the baking of the components. This cake consists of chocolate chip cake, the oreo cookie like chocolate crumb, subtle mint cheesecake, and cookies and cream frosting. I would recommend starting with the chocolate crumb since it is the easiest to do. The techniques used to make the cake can be applied to make your own creations. I have made a Samoa cake which combined Momofuku Milk Bar's pretzel cake recipe with coconut frosting, coconut filling, crushed Somoas, and drizzled caramel and chocolate. Here is how that cake turned out.


Chocolate Crumb

1. First preheat your oven to 300 degrees Fahrenheit.

2. Melt 6 tablespoons of unsalted butter. I like to chop the butter up into smaller pieces and melt the pieces of butter on the low power setting in the microwave. If you use high power for too long, you'll end up with delicious brown butter. Although brown butter is delicious, that is not what the recipe calls for.
3. Measure out the rest of the ingredients in your stand mixer bowl. For amounts 1/4 of a cup or larger, I like to use a kitchen scale to measure out ingredients in grams. It may seem fussy, but it makes things easier.


The rest of the ingredients include:
  • 105 grams of all purpose flour ( 2/3 cup)
  • 1 teaspoon of cornstarch
  • 100 grams of granulated white sugar (1/2 cup)
  • 65 grams of cocoa powder (2/3 cup, Christina wants Valrhona brand, but my pocket book says Hershey) 
  • 1 teaspoon of salt
4. Using the paddle attachment of the mixer, combine the dry ingredients at a low speed.

5. Stream in the melted butter into the mixer at a low setting. Mix until the butter is incorporated and crumbs start to form.

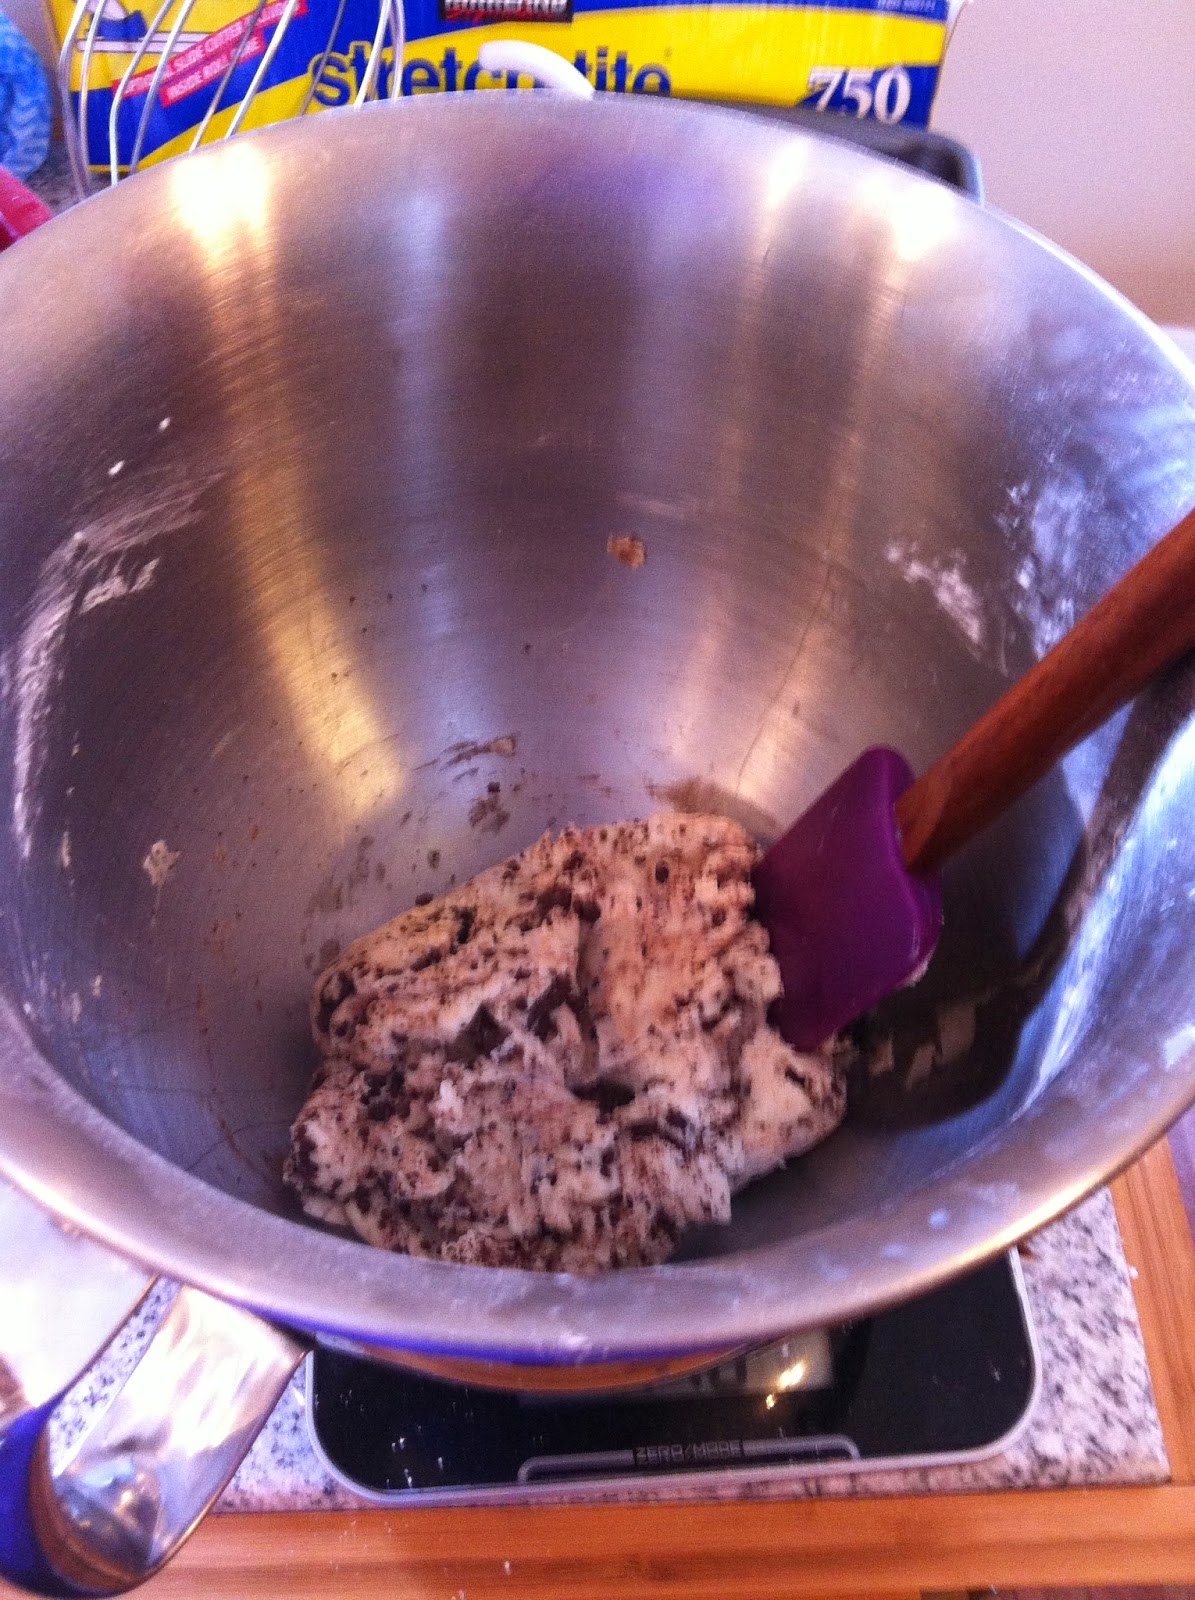
6. Pour the crumbs on top of a baking sheet with parchment paper or a silpat pad. Make sure the crumbs are evenly distributed.  Bake for 20 minutes. I added an additional 5 minutes on top of that. The recipes specifies to break apart large clusters as it bakes, but I never do.  The crumbs will still be a little moist and soft when they come out of the oven. The crumbs will dry and stiffen up once they cool.

Set aside in another container.

Chocolate Chip Cake

1. Preheat the oven to 350 degrees Fahrenheit.

2. Prepare the ingredients.

Place the following in your stand mixer bowl:
  • 1 stick of unsalted butter 
  • 250 grams of granulated white sugar (1.25 cups)
  • 60 grams light brown sugar ( 1/4 cup tightly packed, brown sugar tends to be fluffy, so you really have to cram it in the measuring cup if you use a measuring cup)
In a pourable cup, measure 1/2 a cup of buttermilk, 1 tablespoon of vanilla extract, and 1/2 a cup of canola oil. The recipe calls for grapeseed oil, but Christina Tosi specifically mentions in the ingredients section of her cookbook that canola oil is an adequate substitute for the more expensive grapeseed oil.

Break 3 large eggs into a pourable container. I like to use a liquid measuring cup because it makes it easier to pour 1 yolk at a time.


For the dry ingredients, chocolate chips and preparing the cake pan, I handled them while liquid ingredients were mixing since the recipe instructs to mix them for 6 minutes, but you can prepare them ahead of time as well.

Place all the dry ingredients in one medium bowl. The dry ingredients include:
  • 185 grams of cake flour (1.5 cups)
  • 1 teaspoon of baking powder
  • 1 teaspoon of salt 
Line a quarter sheet pan with either a silpat pad or parchment paper.

Measure out 150 grams of mini chocolate chips (3/4 cup). I have a costco bag of regular size chocolate chips so I used those instead. Mini chocolate chips are ideal because it is easier to evenly distribute smaller chips

3. Combine the butters and sugar in the stand mixer with the paddle attachment for 2 to 3 minutes on medium-high. Don't forget to scrape the edges afterwards.


4. Add the eggs in one at a time and mix on medium-high for 2 to 3 minutes.

5. Pour in the oil, buttermilk, and vanilla into the bowl while the mixture is set to low. Then crank the mixture up to medium-high for 4-6 minutes. This is the time that I prepared the dry ingredients, chocolate chips and the cake pan. The recipe says that the mixture will turn white. I believe with the brown sugar and vanilla, there will still be a brownish ting. Do make sure that you mix it for a while because as the recipe says, you are forcing liquid in a fatty mixture.


6. While the mixer is on low, pour in the dry ingredients into the bowl. Stop the mixer once everything is combined, which should take less than a minute. Overbeating the batter once the flour is in is bad.


7. Pour the batter into the prepared pan. Flatten out the top with a spatula.


8. Scatter and evenly distribute the chocolate chips into the batter. There is no need to press them in since they will sink.


9. Bake the cake for 30 to 35 minutes. When taken out, the cake should not jiggle and the middle should spring back if touched. Bake for 3-5 minutes extra is it is still jiggly.

Feel free to wrap the cake in plastic and store it in the fridge for up to 5 days. It is good to break the baking process up.

Mint Liquid Cheesecake

Christina Tosi calls this recipe liquid cheesecake because the recipe produces a great tasting spreadable cheesecake that is malleable enough to pipe. With the addition of green food coloring and mint extract, it becomes mint liquid cheesecake. Feel free to withhold those two ingredients if you don't want a minty taste or a green tinge.

1. Start by preheating your oven to 300 degrees Fahrenheit.

2. Mix a 1/2 teaspoon of both cornstarch and salt in a small bowl.
2. Whisk in 2 tablespoons of milk.
3. Whisk in 1 large egg.

4. In your stand mixer with the paddle attachment, beat 8 ounces of room temperature cream cheese. If the cream cheese is not at room temperature, you will end up with clumpy cheesecake. Mix on low for two minutes then scrape the sides of the bowl.


5.  Add in 150 grams (3/4 a cup) of granulated white sugar into the cream cheese and mix for 1 to 2 minutes until fully combined.

6. While the mixer is on medium-low, slowly pour in the egg cornstarch mixture into the mixture for 3 to 4 minutes until the cheesecake batter is nice, smooth, and malleable.
7. Ideally, you'll have a 6" by 6" pan that you can line with plastic wrap. I don't have one, so I found the closest container I could. Pour your cheesecake batter into the plastic wrap lined container.

Even with a 6" by 6" pan, the batter comes up relatively shallow. Don't worry. Bake for about 15 minutes until the edges are firm, but the middle is still loose. If your container is bigger than 36 square inches, it will take less time. If the container is smaller, it will take more time. Just make sure you monitor it.

8. Once the cheesecake has cooled, scrape it into another container (with a top if you aren't going to use it right away). Mix in 2 drops of green food coloring and a little bit of mint extract. A little bit of both of those ingredients go a long way.


Cookies and Cream Frosting

 This frosting is super easy to make.

1. In a stand mixture with the paddle attachment mix:
  • 250 grams of powdered sugar (1.5 cups)
  • 95 grams of Crisco shortening (1/2 cup, I like to use the baking sticks which allows you to cut 1/2 a cup of the shortening like butter... but do not get the butter flavored kind)
  • 62 grams of light corn syrup (3 tablespoons)
  • 13 grams of clear vanilla extract (3 teaspoons, I do not have clear vanilla extract, but you can use regular vanilla extract if you don't mind the frosting have a slightly off white frosting)
  • 25 grams of cornstarch ( 2 tablespoons)
  •  1/4 a teaspoon of salt
 

I would start the mixer on low until the powder sugar gets incorporated. If you start too fast, the powder sugar will start puffing out like Mount Vesuvius. The frosting will come together all at once.


2. Combine in 40 grams of chocolate crumbs (1/2 cup) by hand.


Put it in an airtight container if you aren't going to use it right away like I did.


 Assembling the Cake

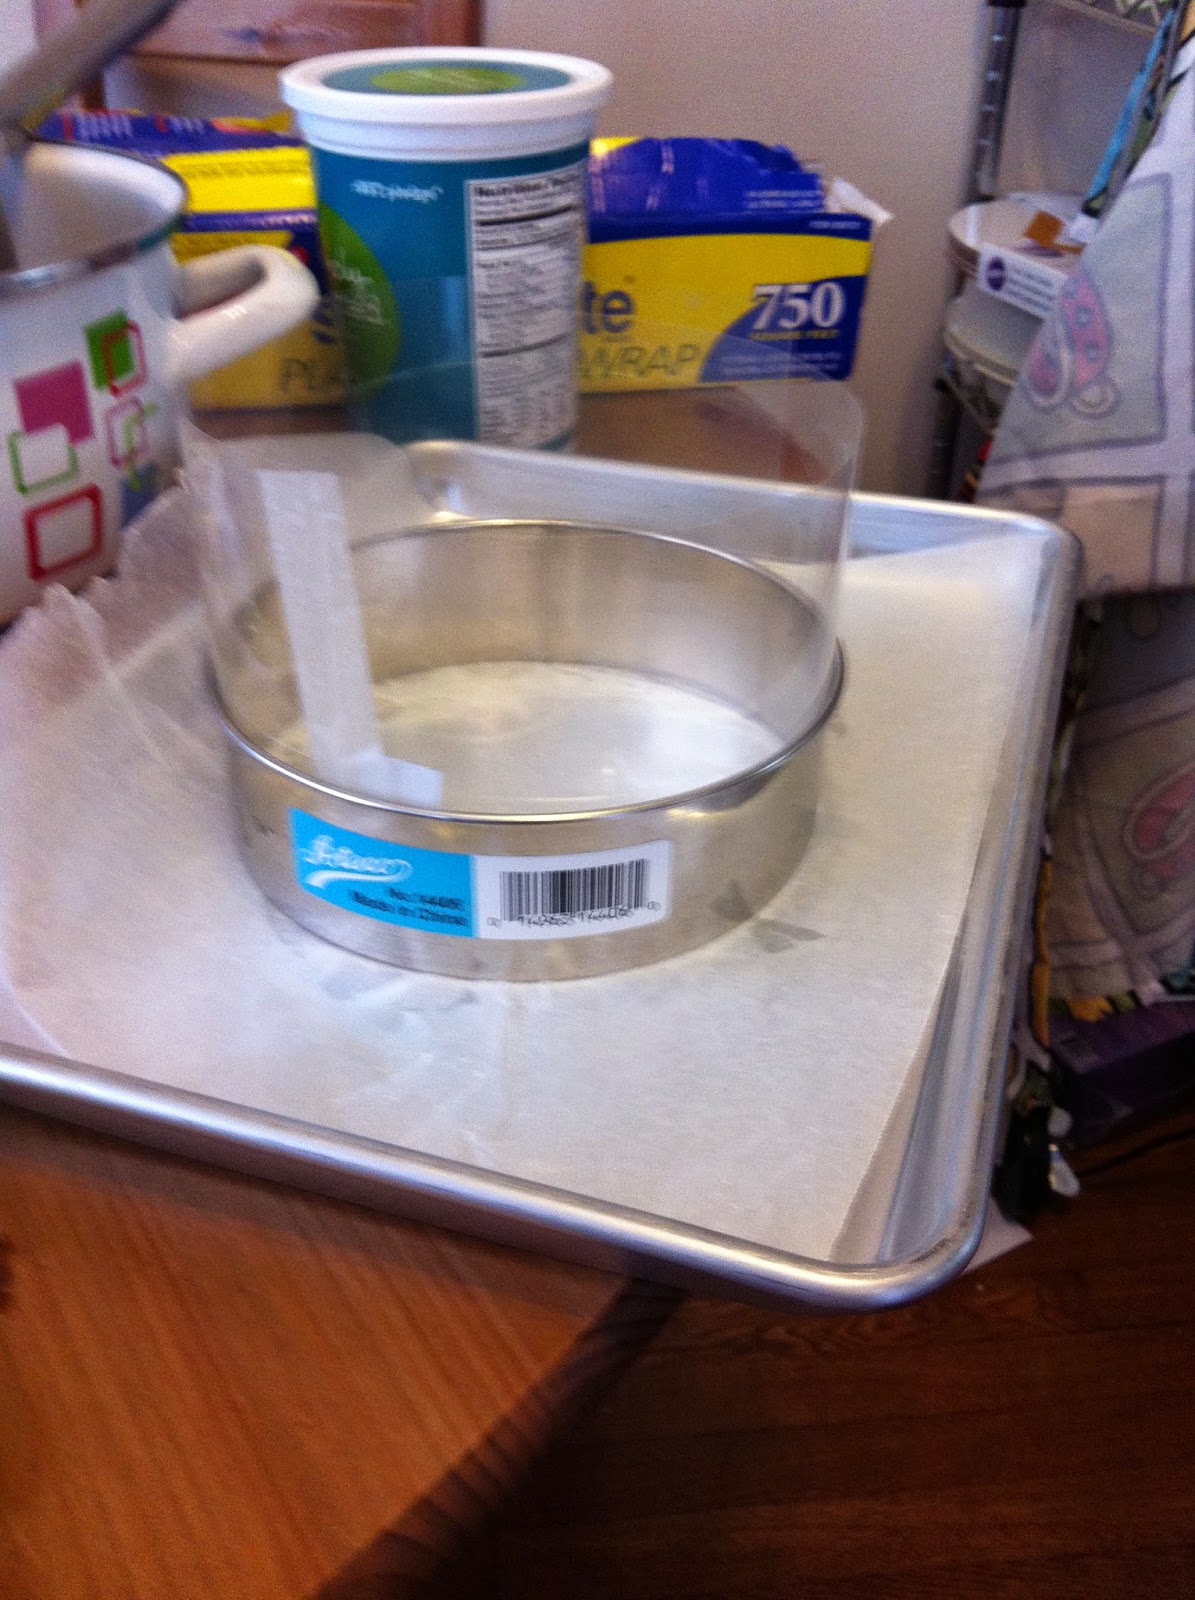
This is the most fun part of making the cake. Putting all the components together.

 1. Invert your cooled cake onto a cutting board. I place the cutting board on top of the cake, clamp the pan and the cutting board with my hand, then invert. Press a 6 " cake ring into the cake near one corner. Then  press the cake ring near (but not adjacent) the first round you made to form an almost full round. You won't be able to get two full rounds. Your three cake layers will be from:
  1.  The scraps
  2. The almost full round will some scraps
  3. The full round
2. The recipe calls for strip acetate to line the cake ring, but that can be hard to find. Instead I took an 8.5" x 11" overhead projector transparency which I soaked in soapy water and rinsed,


and cut it in half on the long dimension to form two skinny strips. I then tapped the short ends together to form one long skinny strip. Take this long skinny strip and form a ring instead the cake ring that is sitting on your quarter sheet pan. I also lined the bottom with wax paper. You can tape the transparency again, but it is not necessary. Heck, I've done it without tapping it at all.
2. Put a 1/4 cup of milk with a pastry brush in a small cup or bowl. With most (but not all) of the cake scraps, pack the scraps into the bottom of the ring/transparency round. Use the back of your hand to even out the layer.


Brush about half the milk evenly across the layer. Don't worry, this milk will help turn these scraps into a nice layer..

3. With the back of a spoon, evenly distribute 1/3 of the frosting on top of your scrap layer. If your frosting is at room temperature, it is easier to spread around.

4. Add about 1/3 of the chocolate crumbs on top.
5. Add 1/2 of the cheesecake layer. It is easier if the cheesecake is at room temperature.

6. Repeat steps 2-5 except take the partial round and pack in as much of the scraps as you need to form a full layer. Still apply milk.

Step 2

Milk

Frosting-Crumbs-Cheesecake
7. Carefully place the perfect layer on top making sure you get it in the transparency.
8. Spread the remaining frosting on top. Pat the rest of the chocolate crumbs on top of that. If there are some leftover, the crumbs are great as a topping for yogurt.

9. Wrap the top of the cake up with plastic wrap. Place in freezer (not the fridge) for at least 12 hours.  I know it is hard to wait that long, but this is when those cake scraps turn into a full layer. Christina said that cake can stay fresh in the freezer for 2 weeks. 3 hours before serving, slide the cake ring off by pushing down on the cake and up on the ring. This can be difficult. You might need to gently lift and giggle the cake. Take off the transparency. Re-wrap with plastic wrap. Place the cake in the refrigerator.

I know this may seem like a lot of work, but this style cake is delicious. Hard work pays off!

If you like the recipe and want to try some more, look at the other recipes on the original recipe link. If you like those, check out the Momofuku Milk Bar Cookbook (http://milkbarstore.com/main/press/milk-bar-cookbook/)

Stay tuned for another blog entry. Comment if you like what your seeing (and possible eating). Comment if you don't.


Sunday, February 15, 2015

Vegetable Tofu Spread

See the original recipe here: http://homemadehearts.ca/2014/04/23/vegetable-tofu-spread/


I love tofu even though I am not a vegetarian. It is cheap and you can do so much with it. If you don't like tofu, I would still recommend this recipe. I let two of my coworkers who either didn't like tofu or hadn't had much experience with it try it and they loved it. Though the recipe calls itself a spread, I would say it is a tofu take on a chicken/tuna salad. This recipe make a great lunch. Please note that I doubled the recipe in the pictures, but will write it out with the original proportions.

1. First you have to prepare the tofu. The recipe calls for 8 ounces extra firm tofu, but I used firm tofu and it worked just fine. Drain and press out the excess liquid from the tofu. To press out the excess liquid. Place the tofu on top of a  paper towel on top of a cutting board. Place a heavy object (in my case two Pyrex baking pans) on top of the tofu and leave the tofu out for about half an hour.

You might want to place more paper towels under the tofu because there is a lot of liquid hidden away in the soy piece of future delicousness.

2. Something I didn't do, but I would do next time is process the carrots first. With all the other ingredients in the food processor, some of the carrot chunks didn't get ground down when I processed the carrots with the rest of the ingredients. I would first process the 1 carrot until the chucks are a little larger than grated cheese. You don't want to process the carrots until it turns into carrot juice. I used baby carrots instead of regular carrots because you don't have to peel them. 

2. Place the tofu into the food processor. I tore the tofu into pieces with my hands to get it all in there.  

3. Place the rest of the ingredients in the food processor. This includes:

  • 1/2 cup of mayonnaise (I used reduced fat olive oil  mayonnaise, but if you wanted to make this recipe vegan, you can use vegannaise) 
  • 1 tablespoon of dijon mustard (I've made the recipe with both smooth and course style dijon mustard. I would recommend using the smooth. Do not use any other type of mustard {yellow, honey, etc}., it doesn't have the seasoning of dijon mustard.)
  • 1 tablespoon of soy sauce (Most people don't have Braggs liquid aminos on hand. Soy sauce or or tamari sauce works just fine.)
  • 1 teaspoon garlic powder, 1/2 a teaspoon of celery seeds, 1 teaspoon of dried oregano, 1/2 a teaspoon of black pepper, and 1/4 of a teaspoon of sea salt (or regular salt) 


4. Process all the ingredients until you get the consistency you want. You are not going to get a completely smooth spread, but you can get a spreadable consistency.

 Now wasn't that easy? I put the tofu spread in a wrap with cucumbers. Let me know what you did.


Monday, February 9, 2015

Shirataki Spicy Beef Soup

Find the original recipe here: http://www.thedailymeal.com/recipes/shirataki-spicy-beef-soup


I just came back from a trip to New Orleans where I ate things like this:
Strawberry Salad
Meat Trio
 Bread Pudding Souffle


These dishes where served at the Commander's Palace. While the strawberry salad wasn't great, the other two dishes were amazing! Veal, bone marrow  and some other meat, and bread pudding souffle with a whiskey sauce.

Now I am trying to eat really healthy. This dish packs a lot of filling vegetables with a delicious broth. I doubled the recipe, but I will give the directions with the recipe's original size. Remember that making soup is not baking. Take all measurements lightly.

1. First start boiling your 4 cups of beef broth. Reserve about 1/3 of a cup from the 4 cups of broth for later.  I used reduced sodium beef broth from a carton. You can always add salt, but you cannot take it away. The broth will probably start boiling before you are done preparing the rest of the components, so keep an eye on it and turn the heat down if necessary.
2. Next you need to prepare the marinade for the beef. Peel part of a ginger with the back of a spoon.

Don't be afraid to try, if you've never peeled a ginger before. Just scrape the spoon against the skin. Mince about 2 teaspoons worth. I would include the extra ginger you might of chopped. It won't hurt. I also chopped some garlic, but lets face it... garlic is good. Scrape the ginger (and garlic) bits into your marinating container. Pour in your 1 tablespoon of soy sauce. I also mixed in some mirin and rice wine vinegar to give the sirloin another dimension. Mix the bits and the sauce together in the container. 
3. Chop your 8 ounces beef up into 1 inch strips. Don't feel bad about putting in a extra beef. I bought sirloin tip sandwich steak which was very lean and easy to cut since it was already sliced thin. Place the beef in the marinating container and mix the marinade with the steak.

4. Shred/slice your veggis which include 2 large carrots, 1/2 a head of Napa cabbage, and 6 ounces of Shiitake mushrooms with their stems removed. I personally don't like mushrooms, so I used zucchini instead. I also had green cabbage already, so I used that instead of Napa cabbage. If you can get pre-shreded carrots, I would highly recommend using that instead of having to peel and shred whole carrots.  Place all the vegetables in one bowl so you can quickly place it into the broth when it is time.

5. Wash your bean sprouts

6. Mix in the rest of the seasoning (the 1 teaspoon of Sriracha and 1/2 a teaspoon of sesame oil) in with the reserve beef broth. It is much easier to mix the seasoning in when it is in a smaller bowl without all the other solid ingredients. Go ahead and increase the Sriracha if you want more of a kick.

I had Sriracha available, but I opted to use Gochujang paste. It is a delicious Korean hot pepper paste that is the base for many Korean dishes like the sauce that comes with Bibimbap.

7. The recipe calls for 1 package of Shirataki fettuccine noodles. These practically calorie free noodles are available at your local super market and can be usually found near the tofu. Shirataki noodles are made from the konjac yam. They are weird and slimy, but if they are prepared correctly, they are a great substitute for noodles/pasta. The noodles are packed in liquid. Drain the noodles over a strainer in the sink. The liquid will smell kind of bad. This is normal. Rinse the noodles for a while with warm water. You also might want to cut the noodles up since they usually come in very long strands.
8. Cook the pasta on a pan without oil for about 5 minutes until most of the rinsing water evaporates and the noodles start squeaking when moved.
9. By now your broth should hopefully be boiling. Pour the beef and the marinade into the broth for about 2 minutes.

10. Pour the veggis (not including the sprouts) into the pot and cook for another 2 minutes.
11. Pour the noodles, the seasoning broth mix, and sprouts into the pot. Cook for another 2 minutes.

12. Turn the burner off and taste the broth. Add salt and pepper as appropriate.


I  really liked how this dish turned out. I probably would have added a little more beef. Please tell me how your version tasted.